I have wanted to learn human anatomy for years but I’ve progressed very slowly with it. I am sure you know that feeling when it is actually boring drawing hands or the skeleton over and over again. Maybe you are drawing quick gestures to lean anatomy but you can’t keep yourself doing it everyday. You know that if you pratice it daily you will be good with anatomy. Yes, you will be, if you have the resolve to do this everyday. But what if you don’t want to do it daily?
You don’t have to. There is a way to learn anatomy more faster and more effectively without it being boring.
The trick is to learn anatomy while you are working on an actual artwork. But before I tell you the process you should know why anatomy is important. Knowing anatomy is useful if you want to create artworks with people on it, or if you want to make a comic book – then it is absolutely necessary.
If you don’t know about anatomy your characters will look strange, flat, they will lack the 3D effect. Human anatomy is very complex, but you will learn it step by step. Once you have the foundation you can expand (actually you will do this automatically) your knowledge about it. As you will progress you will see more muscles on the body, you will feel the little shapes of the body more. At first a decent figure will be more than enough. The tiny details will find you after that eventually. That is what I really like in this so much. So how does this work?
Get the basic understandings of human figure
First start with sketching people from real life. This excercise has just one important goal: your consciousness mind should learn and feel the proportion of a human figure. Drawing regularly people from life will help you in this. It is enough if you just sketch the main shapes of someone. You don’t have to make these everyday, there is no need overwhelming yourself or be bored of it. For me I have made these every two week or so for 3 months – but I did more at the same time.
Ask someone to pose for you, try out different poses for every drawing. The harder the pose the more you will learn and the more fun you will have. :) Give yourself 5 minutes for each drawing then change pose and start drawing again. Do this for half an hour or an hour. You will learn a lot.
If you do this excercise you will be able to sketch people. Sketching is important and you will need it when you sit down to create an artwork. Think about this as a warm up skill.
Draw and learn step by step while working on an artwork
Here comes the fun part. You have an idea of a character, but how can you put him/her on paper? Sketch. At first, think of a pose make some sketches of it. If you find it hard take some reference photos of yourself (or someone else) in that pose then use that as a guide for sketching the pose. (It is important that you don’t trace the photo. You look at it, understand the movement of the person, then you try to imitate that movement on your drawing.)
Once you have the basic sketch you can spend some time cleaning and detailing out all the important parts of it. What do I mean by this? For example you want to draw a character waist up holding a cup in his hand. You have the sketch, now check what are the bigger parts of it? The character has a head, the chest, and his hands and finally the cup. Here comes the learning: How does a male body look like? Get photos of male chests, get a new paper and start sketching chests. Try to get reference photos of different angles of the subject. This way you will have a better understanding of how it works. Focus on the muscles, the details and the whole shape too. Make as much practice drawings as you need (this can take 10 minutes or more) then apply what you have just learned on your main drawing. You will feel the difference!
I recommend taking a break here (you can even have a day break if you want to). After that you will draw the head. The process will be the same. Search for portrait photos and draw heads from different angles. For this step I recommend using the face collections of Posemaniacs. Here you can choose a head and draw it from any angle – it lets you turn it. Draw those heads in as many angles as you can. Focus on how the neck and the head meets. Check out those neck muscles. Draw at leas 10 heads. Once you are down with that (maybe take a break) I recommend watching this head tutorial from Proko. Draw this again many times (even after you have finished this artwork, I recommend doing these head drawings as much as you can.) You will have more understanding how the head works. Now apply what you learnt on your drawing.
Give yourself some time before proceeding to the arms. Again take a day break if you need to, because this is a lots of new stuff you are learning. For the arms I recommend to do some practice sketching again. Draw the skeleton of the hand, draw your own hand in different poses. Make 5 drawings or more if you want to, and try to understand how the fingers are working, how the basic shapes of the hand are working. Get out your reference pictures for your pose and make a sketch of it too. Then again apply what you have learnt on your real drawing. You are almost done.
For the cup repeat the process (yes, this technique works with any subject matter!). Just grab some reference photos of cups and sketch it. Finally draw the cup on your artwork. With a few lines it will be done and you can move to cleaning (and/or inking) your lines and coloring the artwork.
Why smaller steps are good?
If you take your subject matter for smaller parts like this it will be more easier to draw it and you will have more success with it at the end. But know that this will take long at first. You will learn and apply new things and this takes time. However the result worths it. What you learn will be there when you start an other artwork next time so you will progress faster each time you finish a drawing.
This technique lets you focuse on one thing at a time, that is why you will understand that better. Since you have a goal (you want to draw a character in a given pose for example) you will more likely pratice the stuffs you need to draw it. That is why it is so good to do it this way than just learning anatomy from head to toe from a book. Applying what you learn in a real situation will make you really progress.
Enjoy these smaller steps and work on one part until you are satisfied with it. Try to keep the whole image at the same detail level at the whole time. You will learn a lot from this and you will be able to use what you have learnt on your next drawing so you will draw that faster and with much more success.
You can make your drawing into as many smaller parts as you want to. You may end up spending a day just on the eyes, making many eye sketches before drawing the real one on your artwork. This is a good way to learn stuffs when you actually need them.
Most of the times if you don’t progress with anatomy it is beacuse you dont know where to start, what to learn first, what to concentrate on. If you have an idea of a picture before you, you know what you should learn to be able to draw it.
Draw more and more
Try out this method, learn just what you need at that time and you will feel it is more satisfiyng, less overwhelming and much rewarding at the end. The more you draw like this the faster you will progress and the faster you will draw and soon you won’t need to make practice sketches before an artwork, you will be able to draw it right away. This technique also works with any kind of subject matter: animals, creatures, plants, mountains etc.
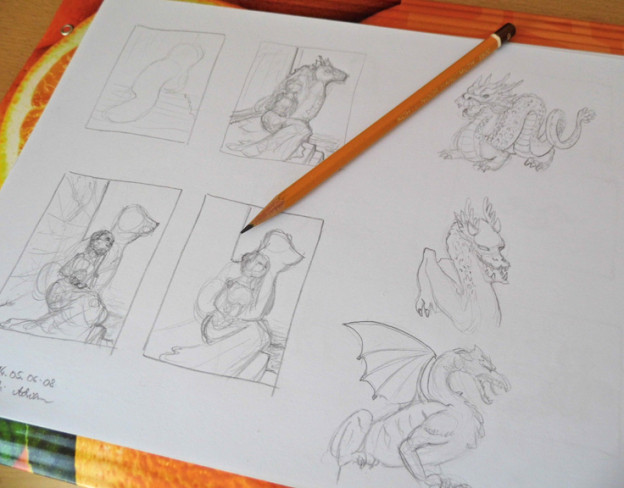
Here are some dragon sketches I did before I made the artwork: Together.

You might feel that this takes long. Yes, it will at first, so I recommend creating one artwork this way while working on other artworks the usual way you do so you will have fun any results at the same time.
Adjust the technique to your liking. You can use it on some part of an artwork that you find hard drawing or you can draw every single artwork this way. Whatever you feel comfortable with is fine. Experiment with it so that it fits your work style.
Good luck and have fun drawing! Let me know if this technique helped you and please share this technique with your fiends too.
Have you enjoyed this post? Get on my newsletter to be notified about new ones. You will also get a motivational desktop calendar!